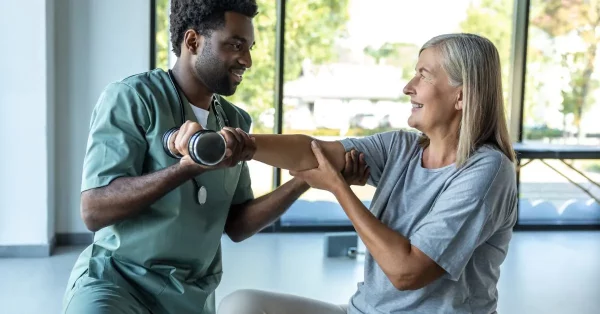
Hand therapy putty exercises can help you regain strength and dexterity in your hand with a simple, affordable accessory.
Before we dig into the exercises, we will discuss how to get the most from your hand therapy putty exercises.
Getting the Best Results from Hand Putty Exercises
Hand therapy putty exercises will strengthen hand function and improve finger dexterity.
Sometimes hand weakness is the result of a stroke or other neurological injury. In these instances, it’s important to realize that the goal in the exercises is to strengthen the connection between the brain and the hand.
When neurologic impairment disrupts the brain’s ability to send correct signals to your muscles, hand therapy putty exercises stimulate healing. The more you use your hand (or even try to use your hand), the more you signal to your brain a demand for that function, and the brain will adapt in response.
This phenomenon is called neuroplasticity: the brain’s ability to adapt and rewire itself based on experience. When you begin to practice hand therapy putty exercises on a daily basis, it stimulates the brain and promotes the rewiring process.
If you consistently perform these hand therapy exercises, you can expect hand function to improve due to neuroplasticity.
Now that you understand how your body benefits from hand therapy putty exercises, let’s start moving.
Hand Therapy Putty Exercises to Try at Home
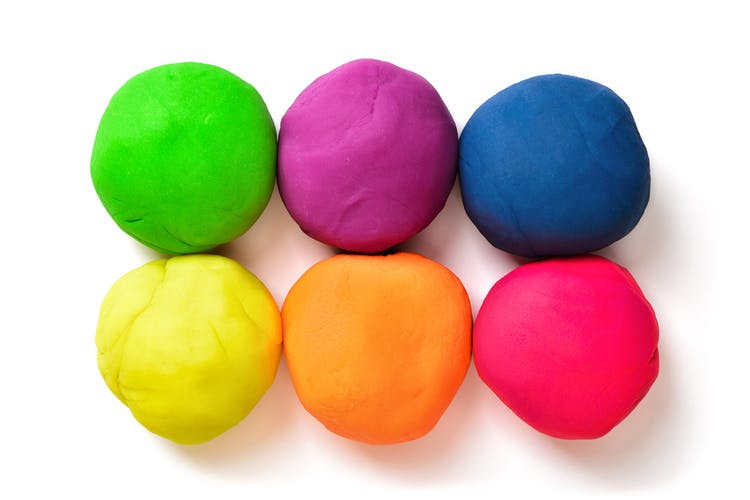
The following hand therapy putty exercises were created to accompany our therapy putty pack available on Amazon.
Try to accomplish these exercises on a daily basis to stimulate neuroplasticity and create strength and coordination.
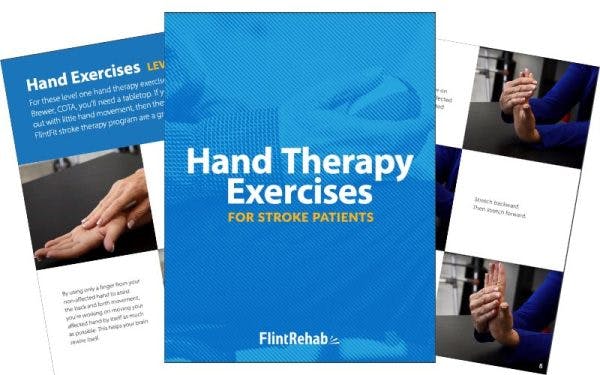
FREE PDF: Want all of these exercises in a convenient PDF? Download it for free here.
Power Grip
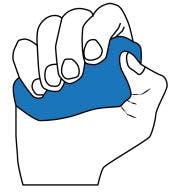
The power grip is the first exercise in our list of eight therapy putty exercises. This exercise is helpful for all ability levels. Grab your putty and squeeze it using all five fingers, then relax. Repeat this several times for a strengthening and therapeutic effect.
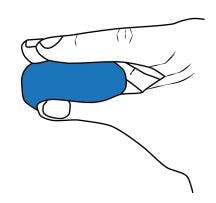
Full Grip
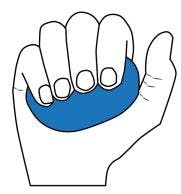
For this hand flexion exercise, roll the putty into a ball and hold it in your palm. Then, press all your fingers except the thumb into the putty. This exercise adds one layer of challenge to the previous exercise by removing the muscular thumb from helping.
Finger Scissors
Next in your hand therapy putty exercises, roll your putty into a ball and squeeze it between your fingers. Try doing it with all your fingers to give your hands extra therapy. Squeeze between your index finger and middle finger. Then, your middle finger and ring finger. Then, your ring finger and little finger.
You can use more or less putty to change the size of the ball and, therefore, modify the challenge and adapt to the size of your hand.
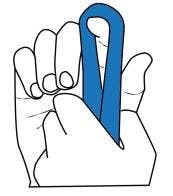
Finger Spread

Roll the therapy putty out into a cylindrical shape and then wrap it around two fingers to form a donut shape. Then, spread your fingers apart. This resistance exercise focuses on extending the muscles that were flexed in the previous exercise.
Fingertip Pinch
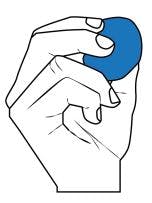
Roll your hand therapy putty into a ball and pinch it using your thumb and fingertips. If you have spasticity in your hand that makes it difficult to move each finger individually, press all fingers into the putty at once. As you improve, try to press each finger individually into the putty.
Flat Pinch
Straighten your fingers as best you can, and pinch the putty between your fingers and thumb. This differs from the previous exercise because the fingers remain straight instead of curled, therefore different muscles are being utilized. This is a strengthening hand therapy putty exercise.
Full Finger Spread
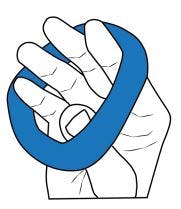
Roll the putty out into an even longer cylindrical shape than before and wrap it around all your fingers to form a circle. Then, spread your fingers apart. This movement targets extension of your finger joints instead of flexion.
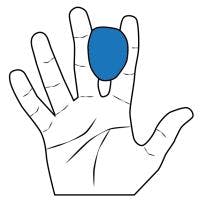
Finger Extension
Number 8 in our list of therapy putty exercises asks you to roll the putty out and wrap it around one finger while the finger is bent. Then, extend (straighten) the finger while using the putty to provide resistance. This is an advanced hand therapy putty exercise. If you struggle with this movement, try again in a few weeks.
Hand Therapy Putty Exercises PDF
Want all of these exercises in a convenient little PDF? Download it for free here.
Also, don’t miss out on the other awesome freebie below: