If you’ve experienced a stroke that affected your hand function, then these therapeutic hand exercises may help improve your hand mobility, strength, and fine motor skills. You will maximize the benefit from these hand exercises for stroke patients through consistency and high repetition. Massed practice on a daily basis is the best way to increase your hand function and recovery post-stroke.
The following stroke exercises for the hand are organized from easiest (Level 1) to hardest (Level 3). Stroke survivors that have more hand weakness or paralysis can start with Level 1. Others can still use the Level 1 as a warm up and progress to the more complex hand exercises for stroke.
Use the links below to jump straight to any section:
- The Importance of Hand Exercises After Stroke
- Video: Hand Exercises with Barbara, OTA
- Level 1: Gentle Hand Exercises
- Level 2: Moderate Hand Exercises
- Level 3: Challenging Hand Exercises
The Importance of Hand Exercises After Stroke
Think about how often you use your hands every day. They are necessary for nearly all activities of daily living and self-care skills such as bathing, grooming, eating, and dressing. Because of how much we rely on our hands, it can be devastating to lose some of that function after a neurological injury like a stroke.
Depending on the severity and location of the stroke, survivors may present very differently from one another. For instance, strokes of the middle cerebral artery (mca stroke) in the brain result in weakness primarily in the upper extremity, while anterior cerebral artery strokes usually affect the lower extremity more.
A stroke in the brainstem or cerebellum can affect coordination and motor control on the same or both sides of the body. This is because blood vessels supply specific regions of the brain that are responsible for different functions or parts of the body. This makes every stroke unique even when they may share some similar symptoms. A physical therapist and occupational therapist specializing in neurological conditions can help stroke survivors create an individualized rehabilitation program specific to your needs.
Video: Hand Exercises for Stroke Patients with OTA Barbara
Barbara is an occupational therapy assistant with experience helping stroke survivors regain hand function. She worked with Flint Rehab to share helpful hand exercises that you can follow along to from home.
Follow along to her video demonstrating various therapeutic hand exercises for stroke patients:
When you practice your hand exercises, high repetition is the goal. This helps stimulate the brain and encourage neuroplasticity.
Neuroplasticity is the process the brain uses to rewire itself and bounce back from injury. Remember this: “nerves that fire together, wire together,” which essentially translate to “the more you use it, the more you improve it!”
When you repeat a movement on a regular basis, like these hand exercises, it encourages the brain to build and strengthen neural connections that help make the movement easier in the future.
The brain responds to stimulation, particularly high repetition and specific stimulation. When you repeat hand exercises on a daily basis, it tells the brain that hand function is important. In response, the brain strengthens those pathways that control hand function to make it more efficient.
Level 1: Gentle Hand Exercises for Stroke Patients
If you have limited hand movement or hand paralysis, Level 1 stroke exercises for the hand are a great place to start.
These exercises can be practiced passively by using your non-affected hand to assist your affected hand. Although your non-affected arm is doing more of the work, stimulation from passive exercise to mobilize the affected hand still helps activate neuroplasticity.
During passive exercise, it’s still extremely important to make the effort on your affected arm to perform the movement; even if you are not able to get any significant muscle activation, research shows that mental practice and even just thinking about the movement can stimulate neuroplasticity as well.
Here are some gentle hand exercises for stroke patients to try at home:
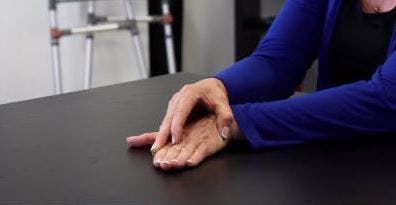
1. Palm Up and Down
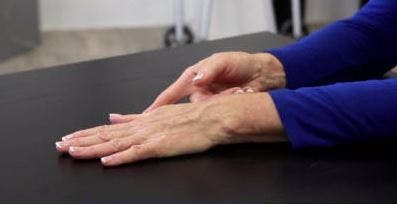
This motion, known as pronation (palm down) and supination (palm up) is important for dressing, carrying objects, and turning doorknobs. For this therapeutic hand exercise, place your hand palm-down on a table. Then, use your non-affected hand to turn your palm up. Repeat: Palm up, palm down for a total of 20 repetitions.
2. Wrist Flexion and Extension
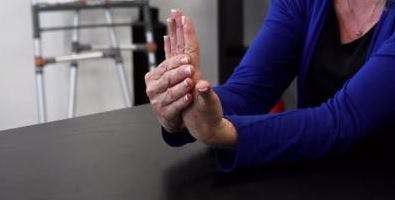
For the next exercise, gently bring movement into the wrist. While keeping your elbow on the table, place your non-affected hand on the palm rather than the fingers to stretch your affected hand at the wrist. Stretch backward, then forward. Perform this movement slowly and in a pain-free range.
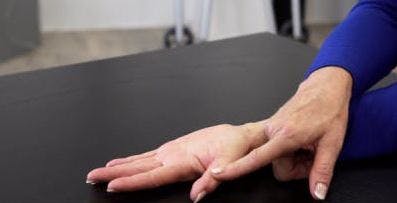
3. Wrist Side Movement

This side-to-side wrist movement is called ulnar deviation (towards the pinky) and radial deviation (towards the thumb). It’s not a common movement done in isolation, but is critical for getting your wrist/hand into the right positions for a variety of tasks like grasping, lifting, and writing. This is the last level 1 hand exercise for stroke patients.
Place your affected hand on the table with your palm down. Then, use your non-affected hand to slide your hand to the left, then to the right. Repeat slowly side to side like a windshield wiper 20 times.
Level 2: Moderate Hand Exercises for Stroke Patients
The following hand exercises for stroke patients are appropriate for people with some hand mobility, but may have some spasticity or weakness still.
The key to effectively regaining movement in your hand is to practice these stroke hand exercises regularly. If necessary, you may still use your non-affected hand for assistance, but make sure you are helping only enough to complete the movement.
Here are the Level 2 therapeutic hand exercises for stroke patients:
4. Rolling Movement
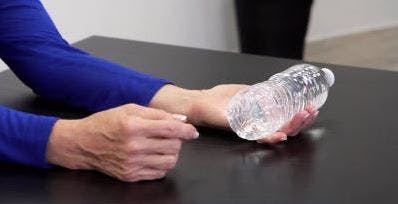
For this slightly advanced hand exercise, place a water bottle in your affected hand. Keep your hand and fingers relaxed.
Curl your fingers as you grasp the water bottle in your hand. Then slowly release back down. Repeat the movement by continuing to open and close your fingers slowly around the bottle so your brain has time to recognize and retrain the motion. Perform 10 to 15 repetitions.
This hand exercise is a great way to isolate and strengthen the wrist and finger flexor muscles in the hand to improve grasp.
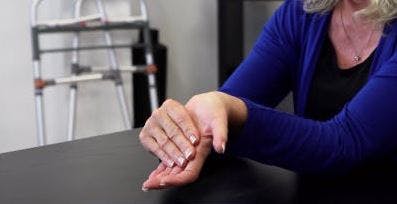
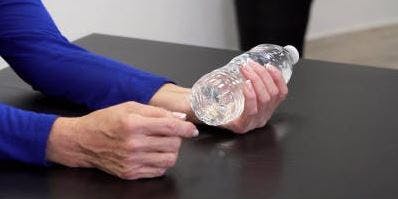
5. Wrist Curl

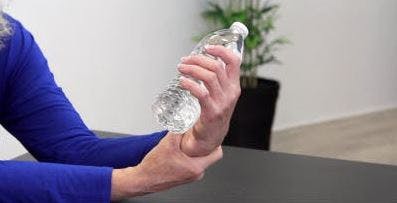
This stroke hand exercise is like a bicep curl, but for your wrist, and is helpful for improving grip function. Hold the water bottle in your affected hand and use your non-affected hand to support your arm.
Allow your wrist to stretch down, and then curl your wrist up. Repeat up and down slowly for 10 to 15 repetitions. You should feel the muscles in your forearm working.
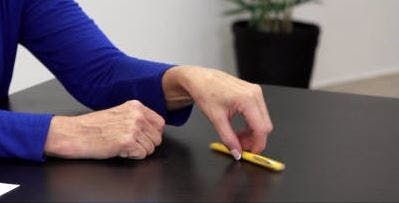
6. Grip and Release
This is the last Level 2 hand exercise for stroke patients and is great for developing more fine motor control.
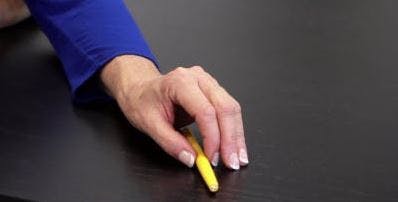
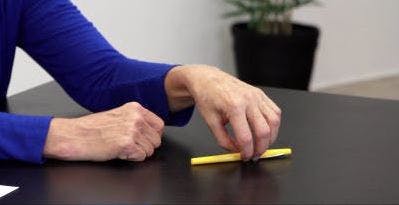
Place a pen on one side of the table. Grip it as best you can with your affected fingers, especially between the thumb and index finger. Slide the pen across the table, and then release.
Focus on gripping the pen gently. To emphasize the therapeutic quality of this exercise, use the least amount of force necessary to move the pen.
Repeat by sliding the pen back and forth across the table, keeping your forearm on the table. This helps to isolate the wrist and hand while preventing compensation with the shoulder to complete the movement (known as synergistic movement).
Only perform the exercises that are challenging, not frustrating. If you are unable to do it at first, then use a little help with your non-affected hand, or do some mental practice and try again in a few weeks.
Level 3: Challenging Hand Exercises for Stroke Patients
The following hand exercises for stroke patients are intended for those with some normal hand movement and dexterity, but want to further improve fine motor control.
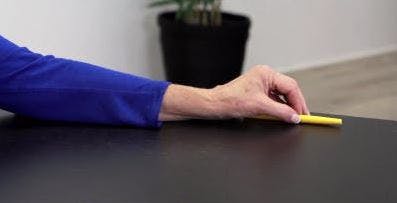
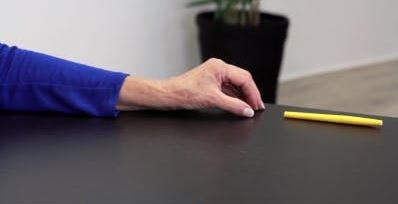
7. Pen Spin
For this advanced hand exercise, place the pen on the table and use your thumb and fingers to spin it. Stabilize your elbow on the table to prevent the use of your shoulder during this movement. Focus on isolating your thumb, index, and middle fingers.
Challenge yourself with speed during this exercise. Spin the pen quickly for 15 seconds, then try to spin it in the opposite direction.
8. Coin Drop
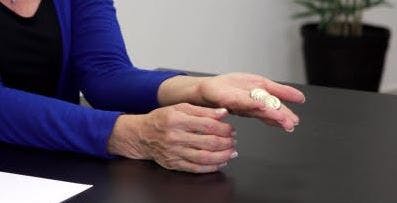


This advanced hand exercise is comprised of 3 movements. Start by placing 8 quarters in a row in the palm of your affected hand. Use your thumb to move one quarter to grip with your index finger and thumb.
Then, place the quarter onto the table while keeping the other quarters in your hand using your other fingers. This is called in hand manipulation and translation skills. This is a complex hand exercise because it requires coordination of all 5 fingers.
After you finish placing them down individually, reverse the exercise to pick them back up. You can increase the challenge and also make this a cognitive training exercise by using different size coins (ie. nickels, dimes, quarters) and adding up the amount as you place them on the table in a random order.
9. Water Cup Pours
This stroke hand exercise works on hand and wrist control in a functional way. Take two cups (use plastic instead of glass for safety) with one filled with water. Holding a cup in each hand, slowly pour the water from one cup to the other without spilling.
By alternating the pour between hands, you will work on coordination when pouring as well as stabilization when holding and receiving the water. You can mix it up and work on different grasp types by using regular cups of different sizes or mugs/pitchers with handles.
10. Finger Opposition


For this last hand exercise for stroke patients, try to touch each fingertip to your thumb. Pinch and release starting with your index finger, moving to your middle finger, then ring finger, and finally your little finger. Between each finger tap, fully extend and stretch your fingers so that you’re also working the extensor muscles.
This is the same movement as MusicGlove hand therapy, which is a rehab tool that helps you exercise and achieve high repetition while playing along to a musical game. It’s a fun way to do your own home rehabilitation and is clinically proven to help improve hand function in stroke patients in as little as 2 weeks.
Getting Started with Hand Exercises for Stroke Survivors
By performing these hand exercises for stroke patients on a daily basis, you will be able to improve your hand mobility and function. Try not to be discouraged if recovery happens slowly, because hand mobility takes time and consistency to improve.
If you want to give yourself an extra boost, download our free ebook below. It contains a whopping 25 pages of illustrated hand exercises that you can follow along to at home.
Looking for additional resources? Check out these related articles!